
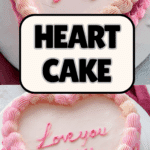
Vintage Heart Cake Tutorial Recipe
If you’ve been dreaming of a cake that exudes charm, nostalgia, and that irresistible homemade vibe, then the Vintage Heart Cake Tutorial is your next baking adventure. This recipe guides you through crafting a heart-shaped delight layered with luscious vanilla buttercream and finished with the most elegant vintage piping that’ll have everyone swooning. It’s the perfect celebration cake that looks as heartwarming as it tastes, bursting with personality and pink-hued sweetness.

Ingredients You’ll Need
Gathering the right ingredients is the first step toward baking your own vintage-inspired masterpiece. Each component plays a crucial role in delivering rich flavor, delightful texture, and that soft pastel hue that defines this cake’s romantic appeal.
- 2 8-inch round cake layers, cooled and leveled: These form the base of your heart-shaped cake and must be perfectly flat for easy carving and stacking.
- Serrated knife: Essential for shaping the round cake layers into precise heart pieces without crumbling.
- 10×10 inch piece of cardboard and/or a 12-inch cake drum: Your sturdy cake base to assemble and showcase your creation beautifully.
- X-acto knife: For cutting out a neat heart shape on the cardboard if you prefer a custom board.
- 3 batches (about 9 cups) of vanilla buttercream: The creamy, sweet frosting that envelops and decorates your cake with luscious layers.
- Food color gels (AmeriColor Deep Pink and Fuchsia recommended): For achieving those dreamy pink shades that make your cake truly vintage.
- Cake turntable: To effortlessly rotate your cake while frosting and piping, ensuring smooth, even coverage.
- Icing smoother and angled spatula: Tools to create polished edges and flawless buttercream surfaces.
- Wilton piping tips 4B, 32, 102 for vintage piping & Tip 3 for writing: These tips bring your vintage piping details and heartfelt messages to life with style.
- Piping bags: To hold and control colored buttercream for your decorative touches.
How to Make Vintage Heart Cake Tutorial
Step 1: Create the Heart-Shaped Cake Layers
Begin by turning your standard round layers into romantic heart shapes. Place one cake layer on a cutting board, then use your serrated knife to slice away two small sections to form the bottom point of the heart. Those very pieces become the rounded top curves when repositioned thoughtfully. Repeat with the second cake layer, using the first trimmed layer as your guide to keep things consistent. For the perfect presentation, trace the heart shape onto cardboard and cut it out with an X-acto knife, making your personal cake board, though you can skip this if going straight onto a cake drum.
Step 2: Assemble & Crumb Coat the Cake
Place the cardboard base or cake drum on your turntable and spread a thin layer of buttercream to “glue” the cake in place. Arrange the first layer and the cut-off curved pieces on top to form the heart shape. Use more buttercream as the adhesive to hold everything securely. Spoon in vanilla buttercream filling, smoothing it to about ¼ inch thick before layering on your second heart shape. To keep things neat, apply a crumb coat over the entire cake, sealing in loose crumbs while emphasizing the heart edges. Chill the crumb-coated cake in the fridge for at least 30 minutes to let it set.
Step 3: Frost the Cake
With your chilled cake on the turntable, slather on a generous layer of smooth vanilla buttercream. Use an angled spatula for the top and an icing smoother for the sides as you gently spin the cake to achieve that perfect satin finish. Don’t forget to delicately push the buttercream around the top edges inward for crisp, sharp corners that define the heart shape beautifully. Pop it back in the fridge for at least 20 minutes before moving on to color and piping.
Step 4: Color the Buttercream (Optional)
Now comes the fun part where vibrant pink hues add personality and depth to your cake’s decoration. Start with a base vanilla buttercream tinted lightly with just a drop of Deep Pink gel. Portion the remaining buttercream into three bowls: the largest batch gets bold fuchsia and deep pink drops for a striking shade, the second bowl deepens slightly with just Deep Pink, while the third remains a soft pastel. Filling your piping bags with these varying tones and matching tips (4B for large shells, 32 for small shells, 102 for ruffles) prepares you for that signature vintage piping flair.
Step 5: Create the Vintage Piping
This is where your cake truly transforms into that stunning vintage masterpiece. Using Wilton Tip 4B, pipe a big shell border along the top and bottom edges—hold the bag at a 45-degree angle, gradually releasing pressure to create those classic fan-like shells. Next, add smaller shell borders just inside the large ones with Tip 32 for delicate dimension. The sides feature whimsical double ruffle garlands piped with Tip 102, using smooth up-and-down motions to craft textured semicircles. Connect the ruffles with tiny piped hearts using Tip 32, which are as charming as they are sweet. Don’t stress about perfect symmetry; part of the vintage allure is that handcrafted feel.
Step 6: Write a Message
With a piping bag and the fine Wilton Tip 3, it’s time to personalize your Vintage Heart Cake Tutorial with a heartfelt message. Keep your buttercream slightly soft for smooth lettering, and feel free to practice on a plate to avoid wobbly lines. If things don’t look just right, chill your cake to set the frosting then gently remove and redo the wording as needed. Center your message, take your time, and watch as your cake not only looks like a vintage gem but also speaks from the heart.
How to Serve Vintage Heart Cake Tutorial

Garnishes
A cake this charming deserves simple yet elegant garnishing. Fresh raspberries or edible rose petals around the base can enhance that vintage vibe. A dusting of finely chopped pistachios or a light sprinkle of edible glitter can also add a touch of glamour without overwhelming the delicate buttercream design.
Side Dishes
Pair your Vintage Heart Cake with light, complementary treats that keep the spotlight on the cake. Think freshly brewed chamomile or rose tea, delicate macarons, or vanilla bean ice cream. These pairings will balance sweetness and add a bit of whimsy, elevating your dessert experience to an unforgettable celebration.
Creative Ways to Present
Presentation can take this cake from pretty to postcard-perfect. Place it on a vintage lace doily atop an antique cake stand or tie a silk ribbon around the base for an added touch of romance. For gatherings, slice into neat heart-shaped pieces and place them on pastel dessert plates, completing the vintage theme from start to finish.
Make Ahead and Storage
Storing Leftovers
Once enjoyed, your Vintage Heart Cake can be wrapped tightly with plastic wrap or stored in an airtight container to keep the buttercream fresh and the cake moist. Keep it refrigerated to maintain the structure, especially in warmer climates.
Freezing
If you want to save your cake for later, freezing is a great option. Freeze the cake uncovered initially to set the frosting, then wrap it well in plastic and foil for protection. When ready to enjoy, thaw overnight in the fridge to retain freshness and texture.
Reheating
This cake is best served chilled or at room temperature, so reheating isn’t necessary. If the cake feels too cold from refrigeration, simply allow slices to sit at room temperature for 15–20 minutes before serving to bring out its full flavor and creamy texture.
FAQs
Can I use other cake flavors besides vanilla?
Absolutely! While vanilla offers a wonderful neutral base that highlights the buttercream, feel free to experiment with chocolate, strawberry, or even almond flavors. Just keep in mind that strong flavors might influence the overall taste of the buttercream and color schemes.
Is it necessary to use specific Wilton tips for piping?
While using the recommended Wilton tips helps achieve the classic vintage piping styles, any piping tips with similar shapes and sizes can work. Experimenting with what you have can also lead to unique and charming results.
Can I skip coloring the buttercream if I prefer a different look?
Definitely. The coloring adds to the vintage heart cake’s traditional pink appeal, but you can use plain vanilla, pastel hues, or even bold colors to match your event or personal style.
How long does it take to complete this Vintage Heart Cake Tutorial?
Depending on your experience and the level of detail you want, expect a couple of hours from start to finish, including chilling times. Taking your time will yield the best results and the most satisfying vintage look.
What’s the best way to transport the cake?
Use a sturdy cake box slightly larger than your cake drum or board, with a non-slip mat underneath to keep the cake steady. Refrigerate before travel to firm up the frosting and avoid decorating until you arrive at your destination for best results.
Final Thoughts
Embracing this Vintage Heart Cake Tutorial is like opening a beautiful chapter of baking joy that combines creativity, skill, and a touch of the past all in one delicious package. Whether it’s for a special someone or just a treat for yourself, this cake brings smiles and sweetness in every slice. So, roll up those sleeves and dive in — your vintage heart cake masterpiece is waiting to become a beloved classic!
Print
Vintage Heart Cake Tutorial Recipe
- Total Time: 1 hour 40 minutes
- Yield: 1 8-inch heart-shaped layered cake (serves approximately 12-14) 1x
- Diet: Vegetarian
Description
This Vintage Heart Cake is a beautifully crafted, vintage-inspired buttercream cake perfect for celebrating special occasions. Using basic round cake layers transformed into a heart shape, this tutorial guides you through shaping, frosting, and creating delicate vintage piping designs using various Wilton piping tips. The result is a charming and elegant heart-shaped cake with smooth buttercream finishes and vibrant pink piping, ideal for birthdays, anniversaries, or romantic celebrations.
Ingredients
Cake Layers
- 2 8-inch round cake layers, cooled and leveled
Buttercream Frosting
- About 9 cups (3 batches) vanilla buttercream
- Food color gels: AmeriColor Deep Pink, AmeriColor Fuchsia
Instructions
- Create the Heart-Shaped Cake Layers: Place the first 8-inch round cake layer on a cutting board. Using a serrated knife, cut two angled slices to form the pointed bottom of the heart, removing two smaller pieces which will form the rounded top lobes of the heart. Repeat with the second cake layer, using the first as a template for cutting. Optionally, trace the heart shape onto cardboard using the removed pieces and cut out with an X-acto knife to create a custom cake board.
- Assemble & Crumb Coat the Cake: Place the cardboard base or cake drum on a turntable and spread a little buttercream to fix the first cake layer. Arrange the two curved pieces at the top of the heart shape and adhere with buttercream. Spread a layer of buttercream filling roughly ¼ inch thick, then place the second cake layer on top and attach its curved pieces similarly. Apply a thin crumb coat over the entire cake to seal in crumbs and accentuate the heart shape, carving a more defined “V” at the top as desired. Chill the cake in the refrigerator for at least 30 minutes to firm the frosting.
- Frost the Cake: With the chilled crumb-coated cake on the turntable, apply a smooth, even layer of buttercream frosting. Start by frosting the top with an angled spatula, smoothing down toward the edges, then frost the sides using an icing smoother while rotating the turntable to achieve smooth surfaces. Use the angled spatula to create a sharp buttercream crown at the top edges by swiping inward. Chill the cake again for at least 20 minutes to firm the frosting.
- Color the Buttercream (Optional): Tinted the initial vanilla buttercream light pink with one drop of AmeriColor Deep Pink. Divide remaining buttercream into three bowls in proportions approximately ½, ¼, and ¼ of the remaining buttercream. Add 2 drops each of AmeriColor Fuchsia and Deep Pink to the largest bowl for a bold fuchsia shade; 2 drops of Deep Pink to the second bowl for a darker pink; and keep the third bowl light pink. Fill piping bags fitted with Wilton Tip 4B (largest batch), Tip 32 (light pink), and Tip 102 (mid-tone pink) respectively.
- Create the Vintage Piping: Start by piping a large shell border around the top edge of the chilled, frosted cake using Wilton Tip 4B. Hold the bag at a 45-degree angle, squeeze to fan out the shell, then gradually release to create the tail. Repeat shell piping along the bottom edge. Next, pipe a smaller shell border just inside the large shell borders on the top and bottom using Wilton Tip 32. For the sides, pipe double ruffle garlands with Wilton Tip 102 by moving the bag slightly up and down while squeezing to form ruffle textures, creating semicircle shapes. Add a second ruffle garland on top for a double effect. Connect each ruffle with small piped hearts using Wilton Tip 32 by forming two overlapping shells.
- Write a Message: Using the remaining mid-toned pink buttercream in a piping bag fitted with Wilton Tip 3, write your desired message on top of the cake. For best results, practice piping letters off-cake first. Ensure the buttercream is of a thin, pipe-friendly consistency—warm slightly or add a tiny amount of milk if needed. If unhappy with your first attempt, chill and scrape off the lettering gently and re-pipe. Once satisfied, your vintage heart cake is complete and ready to impress!
Notes
- Use a serrated knife and take your time cutting the heart shape to ensure symmetry.
- Chilling the cake between crumb coating, frosting, and piping helps the buttercream hold its shape better.
- To create neat and even piping designs, practice the shell borders, ruffles, and hearts before piping directly on the cake.
- If desired, a handmade cardboard heart-shaped cake board can enhance presentation and cake stability, but a larger cake drum works well too.
- Adjust food coloring drops to reach preferred tint shades; less coloring will produce softer pastel tones.
- If the buttercream is too stiff for writing, warm the piping bag or add a very small amount of milk to soften it.
- Remove and re-pipe lettering by chilling the cake and gently scraping with a spatula, but aim to get it right the first time for best results.
- Wilton Tips used: 4B for large shells, 32 for small shells and hearts, 102 for ruffles, 3 for writing.
- Prep Time: 40 minutes
- Cook Time: 30 minutes
- Category: Dessert
- Method: Baking, Sculpting, Piping
- Cuisine: American
Nutrition
- Serving Size: 1 slice (1/12th of cake)
- Calories: 350
- Sugar: 28g
- Sodium: 180mg
- Fat: 22g
- Saturated Fat: 14g
- Unsaturated Fat: 6g
- Trans Fat: 0g
- Carbohydrates: 35g
- Fiber: 0.5g
- Protein: 3g
- Cholesterol: 75mg
Keywords: heart shaped cake, vintage cake, buttercream cake, cake decorating, piping tutorial, Valentine cake, pink buttercream, heart cake tutorial, layered cake