
Red Velvet Cheesecake Cookies Recipe
Introduction
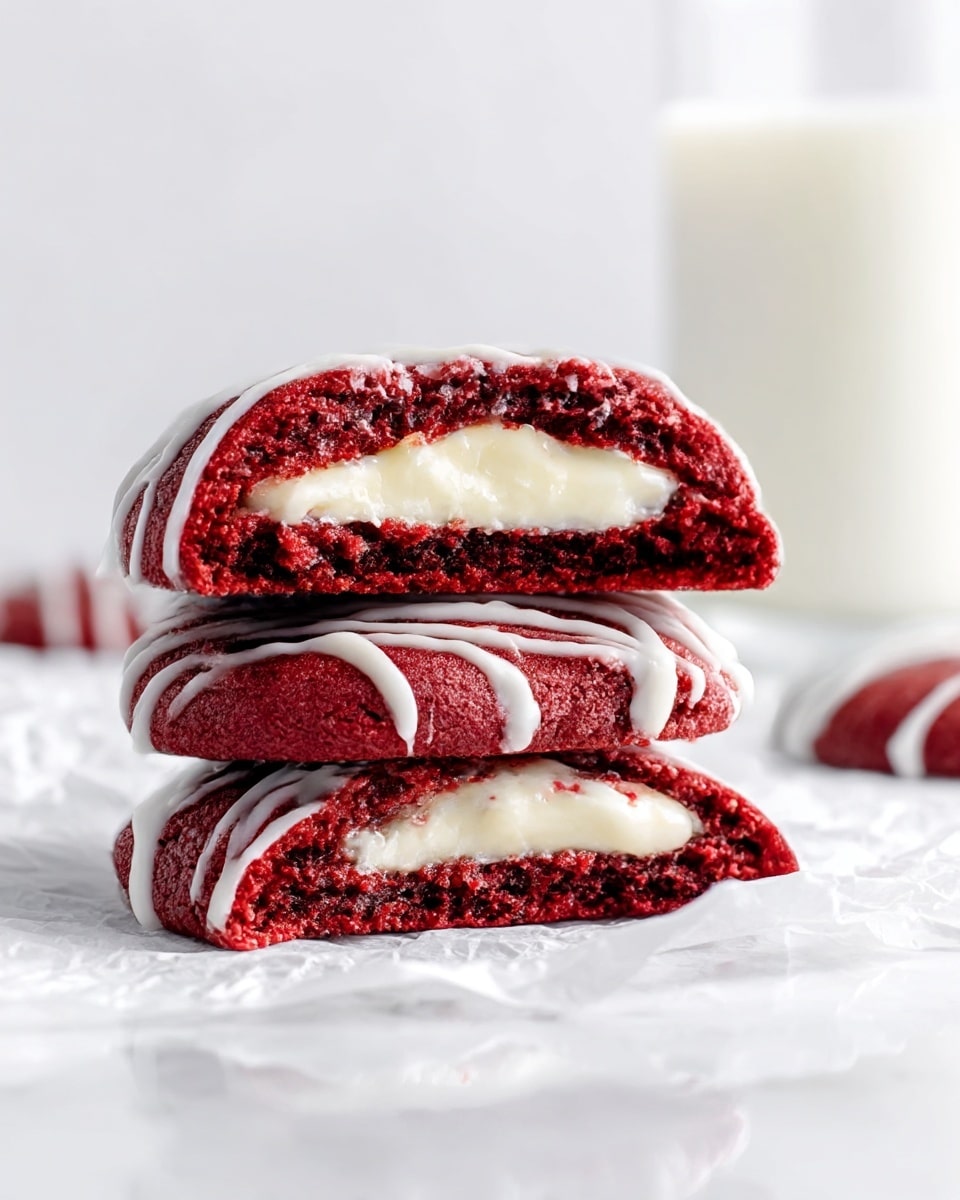
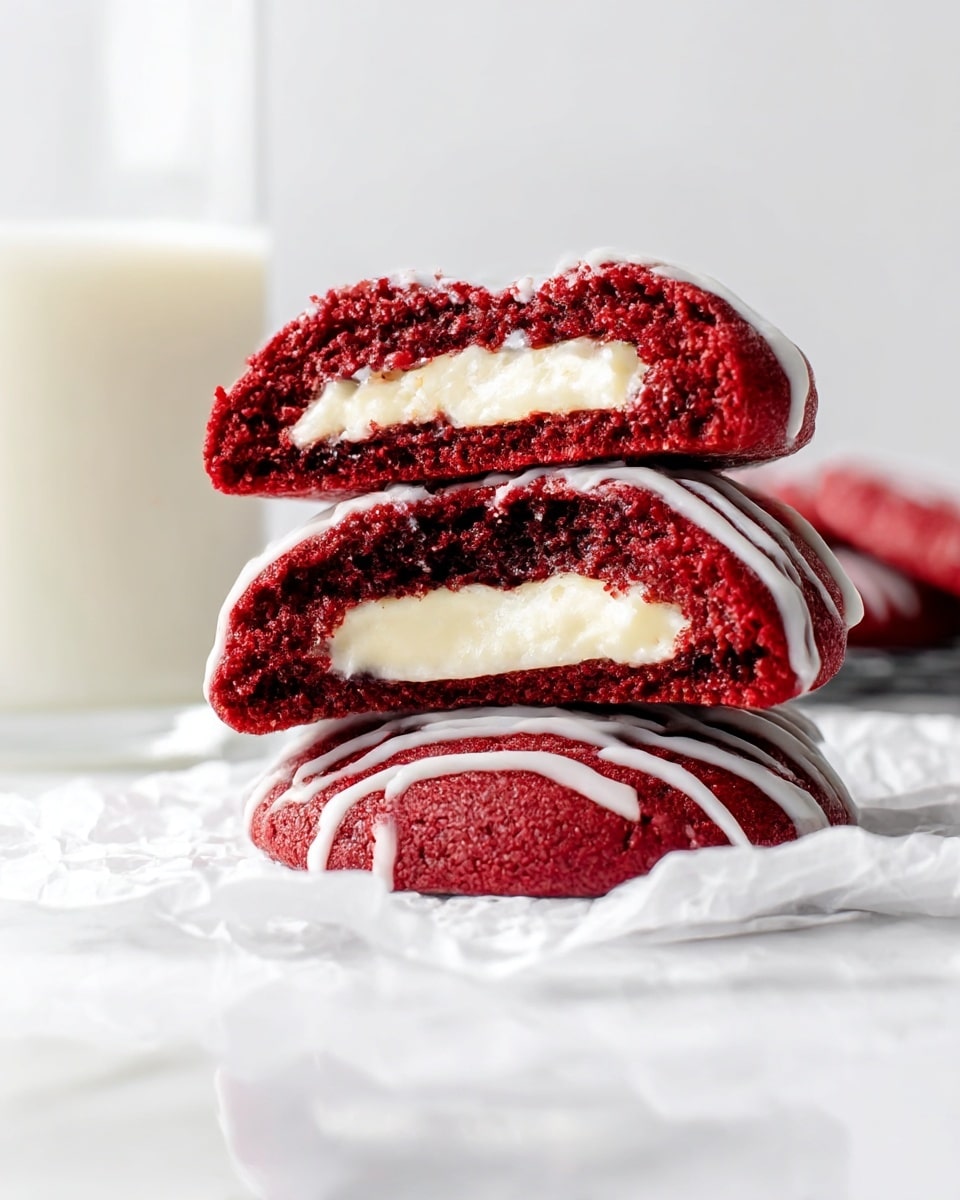
Red Velvet Cheesecake Cookies combine the moist, velvety richness of red velvet with a creamy cheesecake center for a delightful treat. These cookies are perfect for festive occasions or whenever you want a luxurious bite-sized dessert. The optional glaze adds a shiny, sweet finish that’s sure to impress.
Ingredients
- Cheesecake Filling:
- 4 ounces cream cheese (112 grams), brick style, full fat
- 3/4 cup powdered sugar
- 1 tablespoon flour
- Red Velvet Cookies:
- 1 2/3 cup all-purpose flour (209 grams)
- 3 tablespoons cocoa powder
- 1/2 teaspoon baking soda
- 1/4 teaspoon salt
- 1/2 cup unsalted butter (112 grams), softened but not starting to melt
- 1/2 cup brown sugar (105 grams), light preferred
- 1/3 cup granulated sugar (67 grams)
- 1 large egg
- 1 teaspoon vanilla extract
- 1 teaspoon distilled vinegar or white vinegar
- 1-2 teaspoons red food coloring, gel recommended
- 1/3 cup granulated sugar (67 grams), optional – for rolling
- Glaze – Optional:
- 1-2 tablespoons milk or whipping cream
- 1-2 cups powdered sugar (110-220 grams)
Instructions
- Step 1: Make the cheesecake filling by beating together the cream cheese, powdered sugar, and flour in a medium bowl until smooth and creamy. Scoop spoonfuls (about 2 teaspoons each) onto a cookie sheet or plate lined with wax paper. Freeze for at least 2 hours before assembling.
- Step 2: Whisk the flour, cocoa powder, baking soda, and salt together in a medium bowl. Set aside.
- Step 3: In a large bowl, beat the softened butter with brown sugar and granulated sugar until creamy. Add the egg, vanilla, vinegar, and red food coloring, mixing until combined. The dough will appear very bright but will mellow after adding dry ingredients.
- Step 4: Gradually mix the dry ingredients into the butter mixture. Cover and refrigerate the dough for at least 2 hours or up to 48 hours.
- Step 5: To assemble, scoop 1 to 1.5 tablespoons of cookie dough, flatten slightly, and shape the edges into a shallow bowl. Place one cream cheese dollop from the freezer on top, then cover it with another flattened 1 to 1.5 tablespoons of dough. Pinch edges to seal the cream cheese completely and roll into a ball.
- Step 6: If desired, roll the dough balls in the additional granulated sugar. Place the balls on a cookie sheet, cover, and freeze for at least 30 minutes before baking.
- Step 7: Preheat your oven to 350°F (180°C) and line cookie sheets with parchment paper. Place frozen cookie dough balls at least 2 inches apart and bake one sheet at a time for 12-14 minutes, until the tops look set.
- Step 8: Let cookies cool on the sheet. For the optional glaze, whisk together 1 tablespoon milk and 1 cup powdered sugar, adding more milk or powdered sugar as needed to reach a thin, drizzle-able consistency. Drizzle over cooled cookies using a spoon or piping bag.
Tips & Variations
- Use gel food coloring for a more vibrant red color; liquid coloring also works but may result in a softer hue.
- Wear gloves when handling the dough to avoid staining your hands with red food coloring.
- Double the recipe for larger batches or holiday gifting.
- Freeze assembled cookie dough balls in a freezer bag for up to 2 months. Bake directly from frozen without thawing.
- For a richer filling, try adding a splash of vanilla extract to the cheesecake mixture.
Storage
Store baked cookies in an airtight container at room temperature for up to 3 days. For longer storage, refrigerate for up to a week or freeze for up to 2 months. If frozen, thaw at room temperature before serving. Reheat briefly in a warm oven if you prefer them soft.
How to Serve
Serve this delicious recipe with your favorite sides.
FAQs
Can I make these cookies without the cheesecake filling?
Yes, you can bake the red velvet cookies on their own, but the creamy cheesecake center is what makes these cookies special and indulgent.
Do I need to use vinegar in the dough?
Vinegar helps enhance the red velvet flavor and reacts with the baking soda for a tender crumb. It’s recommended but not mandatory if you have a vinegar sensitivity.
Print
Red Velvet Cheesecake Cookies Recipe
- Total Time: 3 hours 5 minutes
- Yield: 12 cookies 1x
Description
These Red Velvet Cheesecake Cookies combine the rich, velvety flavor of classic red velvet with a creamy cheesecake filling, resulting in indulgent, soft cookies perfect for any occasion. The cookies feature a vibrant red dough wrapped around a smooth cheesecake center, finished with an optional sweet glaze for extra decadence.
Ingredients
Cheesecake Filling
- 4 ounces cream cheese (112 grams), brick style, full fat
- 3/4 cup powdered sugar
- 1 tablespoon flour
Red Velvet Cookies
- 1 2/3 cup all-purpose flour (209 grams)
- 3 tablespoons cocoa powder
- 1/2 teaspoon baking soda
- 1/4 teaspoon salt
- 1/2 cup unsalted butter (112 grams), softened but not starting to melt
- 1/2 cup brown sugar (105 grams), light
- 1/3 cup granulated sugar (67 grams)
- 1 large egg
- 1 teaspoon vanilla extract
- 1 teaspoon distilled vinegar or white vinegar
- 1–2 teaspoons red food coloring (gel preferred)
- 1/3 cup granulated sugar (67 grams), optional – for rolling
Glaze (Optional)
- 1–2 tablespoons milk or whipping cream
- 1–2 cups powdered sugar (110–220 grams)
Instructions
- Prepare the Cheesecake Filling: In a medium bowl, beat together the cream cheese, powdered sugar, and flour until smooth and creamy. Line a cookie sheet or plate with wax paper, then scoop spoonfuls (about 2 teaspoons each) onto the lined surface. Freeze for at least 2 hours to allow the filling to firm up before assembling the cookies.
- Make the Red Velvet Cookie Dough: In a medium bowl, whisk together the flour, cocoa powder, baking soda, and salt; set aside. In a separate large bowl, beat the softened butter with the brown sugar and granulated sugar until creamy. Mix in the egg, vanilla extract, vinegar, and red food coloring until fully combined; the dough will appear very bright but will mellow after adding dry ingredients. Incorporate the dry ingredients into the butter mixture and stir until a dough forms. Cover with plastic wrap and refrigerate for at least 2 hours or up to 48 hours to firm the dough.
- Assemble the Cookie Dough Balls: Scoop about 1 to 1.5 tablespoons of cookie dough and flatten slightly. Curve the edges up into a shallow bowl shape. Remove one cream cheese dollop from the freezer and place it on top of the dough. Scoop another 1 to 1.5 tablespoons of dough, flatten slightly, and place over the filling. Pinch the edges to fully enclose the cheesecake. Roll gently into a smooth ball. If desired, roll the cookie dough balls in the optional 1/3 cup granulated sugar. Keep the filling dollops frozen until they are used to prevent stickiness. Cover the dough balls and freeze for at least 30 minutes or place in a freezer bag for longer storage.
- Bake the Cookies: Preheat the oven to 350°F (180°C) and line cookie sheets with parchment paper. Place frozen cookie dough balls at least 2 inches (5 cm) apart on the cookie sheets. Do not thaw before baking. Bake one sheet at a time in the center of the oven for 12 to 14 minutes, or until the tops are set. Allow the cookies to cool on the baking sheet before glazing.
- Prepare and Apply the Glaze (Optional): Whisk 1 tablespoon milk with 1 cup powdered sugar, gradually adding more milk and sugar until the glaze is a smooth, white drizzle consistency. Spoon the glaze into a freezer bag, cut a small corner, and drizzle over the cooled cookies. Allow the glaze to set before serving.
Notes
- This recipe can easily be doubled for a larger batch.
- Gel food coloring is preferred for a vibrant red hue, but liquid food coloring also works.
- To avoid getting red food coloring on your hands while assembling, wear disposable gloves.
- Cookie dough balls can be frozen in a freezer bag for up to 2 months; bake directly from frozen without thawing.
- Nutrition information is an estimate per cookie including glaze, assuming the recipe yields 12 uniform cookies.
- Prep Time: 25 minutes
- Cook Time: 14 minutes
- Category: Dessert
- Method: Baking
- Cuisine: American
Keywords: red velvet cookies, cheesecake cookies, red velvet cheesecake, dessert cookies, cream cheese filling, holiday cookies