
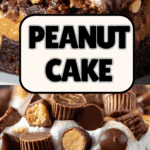
Peanut Butter Cup Dump Cake
“`html
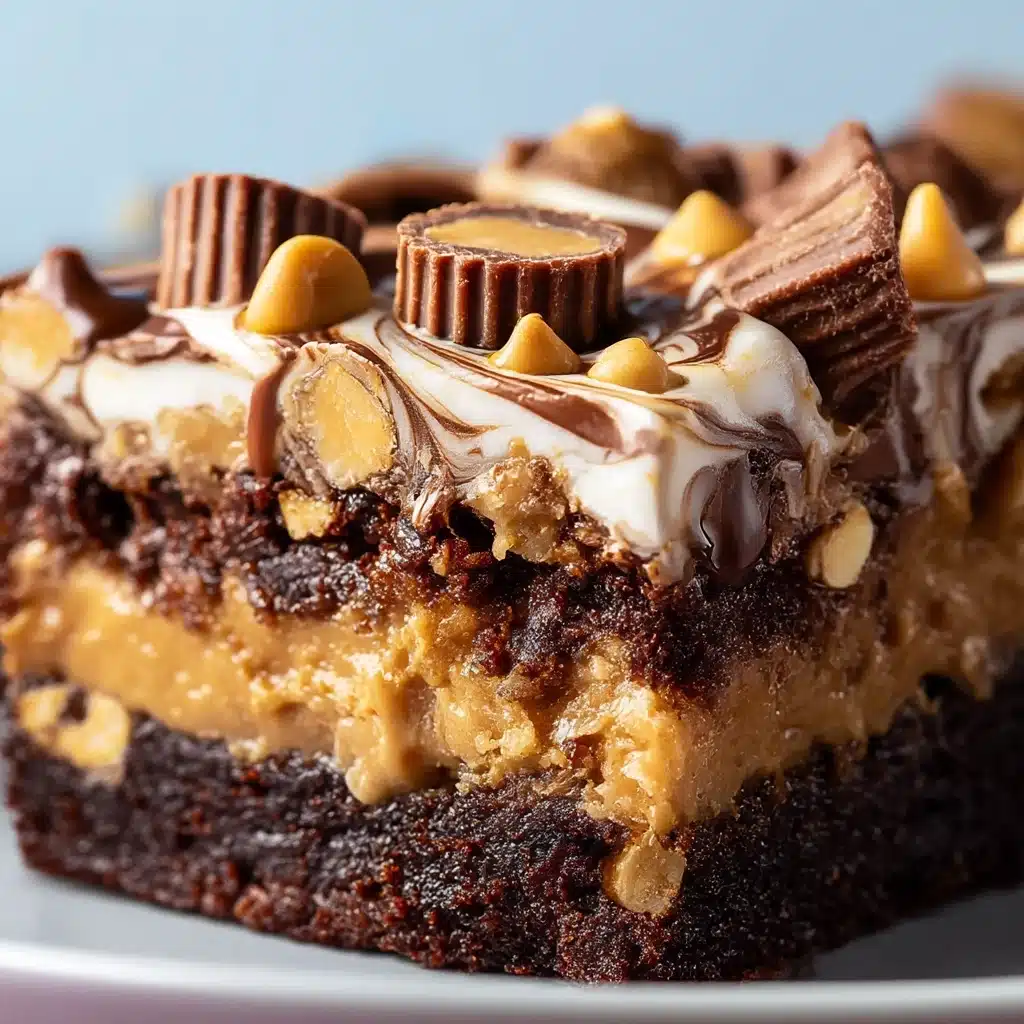
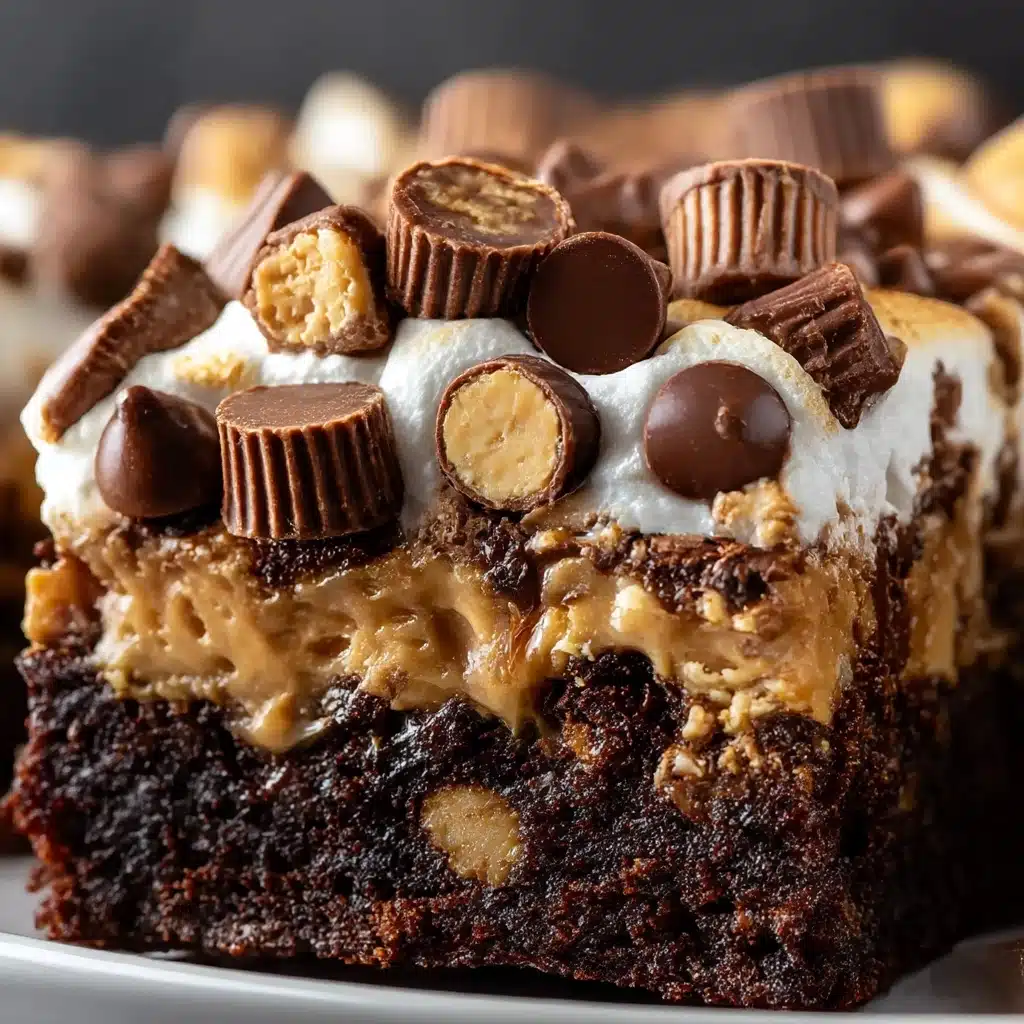
If you’re ready to dive into a dessert that’s pure indulgence without any complicated fuss, this Peanut Butter Cup Dump Cake is your golden ticket. Every layer bursts with rich, comforting flavors that meld seamlessly together – from creamy peanut butter to melty peanut butter cups, luscious sweetened condensed milk, and the irresistible chocolate cake mix topping. The key to achieving that perfectly gooey base and delightfully crisp top lies in one simple but crucial step: Grease your nine by thirteen inch baking dish thoroughly with butter or a little non stick spray to prevent sticking and to help the base cook evenly. This ensures every bite is as luscious as the last, making it an instant crowd-pleaser for gatherings or cozy nights in.
Ingredients You’ll Need
These ingredients come together effortlessly yet every single one is vital to the luscious taste, silky texture, and rich chocolatey color this dessert delivers. From the creamy peanut butter that forms a velvety base to the chocolate chips that melt into gooey pockets, each element plays its part perfectly.
- 1 cup creamy peanut butter: Provides a smooth, nutty foundation that spreads easily for even coverage.
- 1.5 cups chopped peanut butter cups (plus extra for garnish): Adds gooey chocolate surprises and fun texture contrast.
- 1 can (400 g) sweetened condensed milk: Brings a luscious, sweet binding layer that makes the cake ultra-moist.
- 1 box (432 g) dry chocolate cake mix: Gives instant rich chocolate flavor and a perfectly crisp topping.
- 115 g unsalted butter, melted: Enriches the cake’s flavor and helps the top bake to a beautiful golden brown.
- 175 g milk chocolate chips: Melt into soft, chocolaty pockets throughout the topping for extra gooeyness.
- Optional: whipped cream or vanilla ice cream: The perfect cool, creamy contrast when serving.
How to Make Grease your nine by thirteen inch baking dish thoroughly with butter or a little non stick spray to prevent sticking and to help the base cook evenly
Step 1: Prepare and Grease Your Baking Dish
Start by preheating your oven to 175°C (350°F). Here’s a tip that truly makes all the difference: Grease your nine by thirteen inch baking dish thoroughly with butter or a little non stick spray to prevent sticking and to help the base cook evenly. This crucial step guarantees the peanut butter base won’t stick and your cake will bake evenly, resulting in a tender, luscious dessert every time.
Step 2: Spread the Peanut Butter Layer
Take your creamy peanut butter and gently spread it all across the bottom of your prepared pan. Using a rubber or offset spatula helps get a smooth, even layer. This creates a rich, nutty foundation that balances perfectly with the chocolatey goodness to come.
Step 3: Add the Peanut Butter Cup Candy
Scatter half of your chopped peanut butter cups evenly over the peanut butter. These little nuggets will melt into delectable pockets of chocolate bliss, giving each bite delightful surprises.
Step 4: Pour on the Sweetened Condensed Milk
Drizzle the entire can of sweetened condensed milk slowly over your candy layer. This sweet, creamy layer soaks into the peanut butter cups, creating a luscious, gooey texture that makes this cake truly irresistible.
Step 5: Sprinkle the Chocolate Cake Mix
Evenly spread the dry chocolate cake mix over the top, being careful not to stir. This layering technique creates that signature dump cake effect — a cobbler-like crisp topping with soft, gooey layers beneath.
Step 6: Drizzle with Melted Butter
Carefully pour your melted unsalted butter over the cake mix, trying to coat as much of the dry cake mix as possible. This butter is what makes the top bake to a golden, bubbly crisp while keeping the cake moist and rich inside.
Step 7: Top with Chocolate Chips and Remaining Candy
Sprinkle the milk chocolate chips and the rest of your chopped peanut butter cups evenly across the surface. This adds gooey chocolate pockets and more nutty candy richness throughout the final bake.
Step 8: Bake to Perfection
Slide your pan into the oven and bake for 35 to 40 minutes. You’ll want the top to be bubbly with a lightly crispy edge while the inside remains soft and gooey. The smell alone will have you counting down the minutes.
Step 9: Cool and Get Ready to Serve
Let your cake rest for about 10 to 15 minutes after baking. This helps the layers set just enough to scoop easily while staying wonderfully warm and gooey inside. This is when you can add a scoop of vanilla ice cream or a dollop of whipped cream for that extra touch of indulgence.
How to Serve Grease your nine by thirteen inch baking dish thoroughly with butter or a little non stick spray to prevent sticking and to help the base cook evenly
Garnishes
Elevate your serving with a sprinkle of extra chopped peanut butter cups or a few whole mini cups on top. If you want to add a bit of brightness, a light dusting of powdered sugar or a drizzle of melted chocolate makes every slice look and taste more special.
Side Dishes
This dessert pairs beautifully with cool, creamy sides like vanilla ice cream or freshly whipped cream. For a slightly tangy balance, a side of tart raspberries or strawberries can cut through the richness in a delicious way.
Creative Ways to Present
Serve individual portions in small ramekins topped with a scoop of ice cream and a mini peanut butter cup for a fun, personalized touch. Or, for a crowd, lay out a dessert bar with toppings like chopped nuts, sprinkles, or caramel sauce for guests to customize their own slices.
Make Ahead and Storage
Storing Leftovers
After enjoying your cake, place any leftovers in an airtight container. It keeps well at room temperature for up to three days, but for a fudgier texture, refrigerate for up to one week. Not only does this preserve the flavor, but it also makes reheating a breeze.
Freezing
This peanut butter cup dump cake freezes beautifully. Wrap tightly in plastic wrap and aluminum foil before freezing to protect against freezer burn. When you want to indulge later, thaw it overnight in the fridge then warm up slices gently.
Reheating
Reheat individual portions in the microwave for 20 to 30 seconds or until warmed through. The cake will regain its gooey magic, making it taste freshly baked all over again. You can also heat a larger portion in a warming oven set at low temperature, covered with foil.
FAQs
Can I use crunchy peanut butter instead of creamy?
Yes! Crunchy peanut butter adds delightful texture with nutty bits throughout the cake, while creamy keeps it velvety smooth. Both work well, so pick your favorite!
Do I need to mix the cake mix with other ingredients first?
Nope, that’s the beauty of a dump cake. You simply sprinkle the dry cake mix over the layers and then drizzle melted butter on top for even baking. No mixing necessary!
Can I substitute other candies for peanut butter cups?
Absolutely. Chopped Reese’s Pieces, mini peanut butter cups, or even other chocolate candies can add variety and still deliver yummy tastes and textures.
How should I store leftovers for best freshness?
Keep leftovers in an airtight container either at room temperature for up to three days or refrigerated for up to a week. This keeps it moist and delicious.
Is it possible to prepare this cake ahead of time?
Yes, you can bake it in advance and store it cooled. Reheat individual slices to bring back that warm, gooey delight just before serving.
Final Thoughts
This Peanut Butter Cup Dump Cake is a total knockout dessert that’s deceptively simple yet enormously satisfying. The secret to its perfectly tender base and irresistible texture lies in one easy but essential tip: Grease your nine by thirteen inch baking dish thoroughly with butter or a little non stick spray to prevent sticking and to help the base cook evenly. Once you try this recipe, it’s sure to become a go-to for cozy nights, celebrations, or whenever your sweet tooth calls. Trust me, everyone will be asking for seconds!
“`
Print
Peanut Butter Cup Dump Cake
- Total Time: 50 minutes
- Yield: 12 servings 1x
- Diet: Vegetarian
Description
This Peanut Butter Cup Dump Cake is a rich, decadent dessert featuring layers of creamy peanut butter, chopped peanut butter cups, sweetened condensed milk, and dry chocolate cake mix topped with melted butter and milk chocolate chips. Baked until bubbly and slightly crisp on the edges, it offers a gooey, fudgy texture inside. Perfect for parties, potlucks, or any chocolate-peanut butter craving, it is best served warm with optional whipped cream or vanilla ice cream for a comforting treat that’s simple to prepare.
Ingredients
Base & Layers
- 1 cup creamy peanut butter
- 1.5 cups chopped peanut butter cups, plus extra for garnish
- 1 can (400 g) sweetened condensed milk
- 1 box (432 g) chocolate cake mix, dry
- 115 g unsalted butter, melted
- 175 g milk chocolate chips
- Optional: whipped cream or vanilla ice cream, for serving
Instructions
- Prepare baking dish: Preheat your oven to 175°C (350°F). Grease a 23×33 cm (9×13-inch) baking dish thoroughly with butter or non-stick spray to prevent sticking and help even cooking.
- Layer peanut butter: Spread the creamy peanut butter evenly over the bottom of the prepared baking dish using a spatula, making sure to cover the entire surface.
- Add peanut butter cups: Sprinkle half of the chopped peanut butter cups evenly over the peanut butter layer for pockets of melty chocolate.
- Pour sweetened condensed milk: Drizzle the sweetened condensed milk evenly over the peanut butter cups to create a gooey, luscious texture.
- Sprinkle cake mix: Evenly sprinkle the dry chocolate cake mix on top of the condensed milk layer. Do not mix; this forms a cobbler-like top.
- Drizzle melted butter: Pour the melted unsalted butter evenly over the dry cake mix, covering as much surface as possible to help the topping bake to a golden crust.
- Add toppings: Scatter the milk chocolate chips and the remaining chopped peanut butter cups over the top to add extra chocolate and texture.
- Bake: Place the baking dish in the preheated oven and bake for 35–40 minutes, until the top is bubbly and slightly crispy.
- Cool and serve: Let the cake cool for 10–15 minutes before serving. Serve warm, optionally topped with whipped cream or vanilla ice cream for an indulgent finish.
Notes
- For extra crunch, sprinkle 0.5 cups chopped peanuts or crushed pretzels on top before baking.
- Substitute chopped Reese’s Pieces or mini peanut butter cups for variety in texture and flavor.
- Store leftovers in an airtight container at room temperature for up to 3 days or refrigerate for up to 1 week to maintain gooey texture.
- Reheat individual portions briefly in the microwave to restore gooeyness.
- For nut-free option, substitute sunflower seed butter and allergy-safe chocolate candies.
- Gluten-free chocolate cake mix works as a replacement for a gluten-free dessert.
- Always use room temperature peanut butter for easier spreading and best texture.
- Do not stir the layers once assembled to keep gooey pockets intact.
- Prep Time: 10 minutes
- Cook Time: 40 minutes
- Category: Dessert
- Method: Baking
- Cuisine: American
Nutrition
- Serving Size: 1 slice (approx. 1/12th of cake)
- Calories: 460 kcal
- Sugar: 35 g
- Sodium: 280 mg
- Fat: 28 g
- Saturated Fat: 10 g
- Unsaturated Fat: 15 g
- Trans Fat: 0.2 g
- Carbohydrates: 44 g
- Fiber: 3 g
- Protein: 7 g
- Cholesterol: 30 mg
Keywords: peanut butter, chocolate, dump cake, peanut butter cups, easy dessert, potluck dessert, buttery cake, no-mix cake, creamy peanut butter, chocolate cake
