Marshmallow Whip Cheesecake Recipe
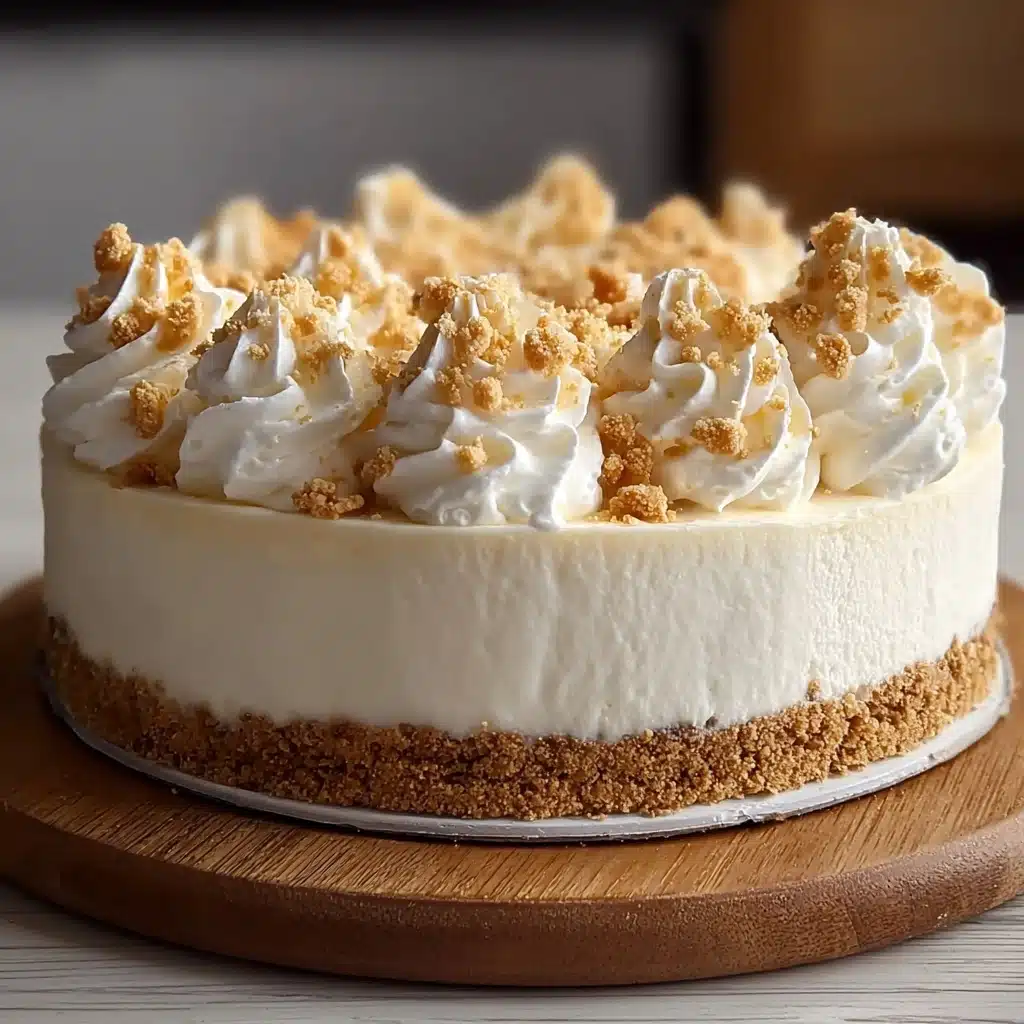
Prepare to fall in love with the enchanting world of Marshmallow Whip Cheesecake! This dreamy, no-bake dessert blends the creamy richness of classic cheesecake with the nostalgic sweetness of marshmallow fluff, all nestled on a buttery graham cracker crust. It’s a slice of pure happiness—simple to make, absolutely decadent, and guaranteed to be the star of your next gathering. Whether you’re celebrating something special or just need a sweet pick-me-up, Marshmallow Whip Cheesecake promises both ease and irresistible flavor in every bite.
Ingredients You’ll Need
Every component of this Marshmallow Whip Cheesecake works a little magic of its own! These staple ingredients come together for maximum impact—creating a dessert that’s rich, fluffy, and just the right amount of sweet. Here’s what you’ll need and why each one matters.
- Graham cracker crumbs: The perfect crunchy and honeyed base for your cheesecake, providing structure and contrast.
- Granulated sugar: Adds a touch of sweetness and helps the crust bind together just right.
- Unsalted butter, melted: Gives the crust that irresistible richness and makes it easy to press into your pan.
- Cream cheese, softened: The star of the filling, delivering that creamy, tangy foundation we all love in a cheesecake.
- Marshmallow fluff: Brings a unique, pillowy sweetness and lightness to the filling—truly the secret ingredient here!
- Vanilla extract: Enhances all the flavors and gives warmth to the marshmallow and cream cheese combo.
- Whipped topping: Folds in unbeatable fluffiness and keeps the cheesecake delightfully airy (no baking necessary!).
- Optional toppings (fresh berries, mini marshmallows, chocolate shavings, crushed graham crackers): Add color, texture, and personalization to finish your masterpiece.
How to Make Marshmallow Whip Cheesecake
Step 1: Make the Crust
Start by grabbing a medium bowl and mixing together the graham cracker crumbs and sugar. Pour in the melted butter and stir until every crumb looks perfectly moistened. You want the mixture to feel a little like wet sand—this helps you pack it into the bottom of your 9-inch springform pan for a sturdy, flavorful base. Press it in tightly and pop the pan into the fridge so your crust firms up while you whip together the luscious filling.
Step 2: Prepare the Filling
This is where the magic happens! Beat the softened cream cheese in a large bowl until it’s smooth, creamy, and utterly dreamy—no lumps allowed. Next, scoop in the marshmallow fluff and pour in the vanilla extract. Mix until well combined and silky. The pièce de résistance? Gently fold in the whipped topping, keeping things nice and airy. The filling should look plush and cloud-like, ready to be spooned onto your crust.
Step 3: Assemble the Cheesecake
Retrieve your prepared crust from the fridge. Pour (or dollop!) the marshmallow whip cheesecake filling right over the crust, then use a spatula to smooth the top until it looks gorgeous. Cover the pan with plastic wrap, slide it back into the refrigerator, and let it chill for at least 4 hours. For best results, leave it overnight—patience pays off with an extra-firm, sliceable texture.
Step 4: Decorate and Serve
You’re almost there! Right before serving, go wild with your favorite toppings. Fresh berries bring brightness and color, mini marshmallows echo the filling’s playful side, and a drizzle of chocolate sauce or a sprinkle of graham cracker crumbs makes it look irresistible. Unclip the springform pan, slice up your beautifully chilled Marshmallow Whip Cheesecake, and serve with a smile.
How to Serve Marshmallow Whip Cheesecake
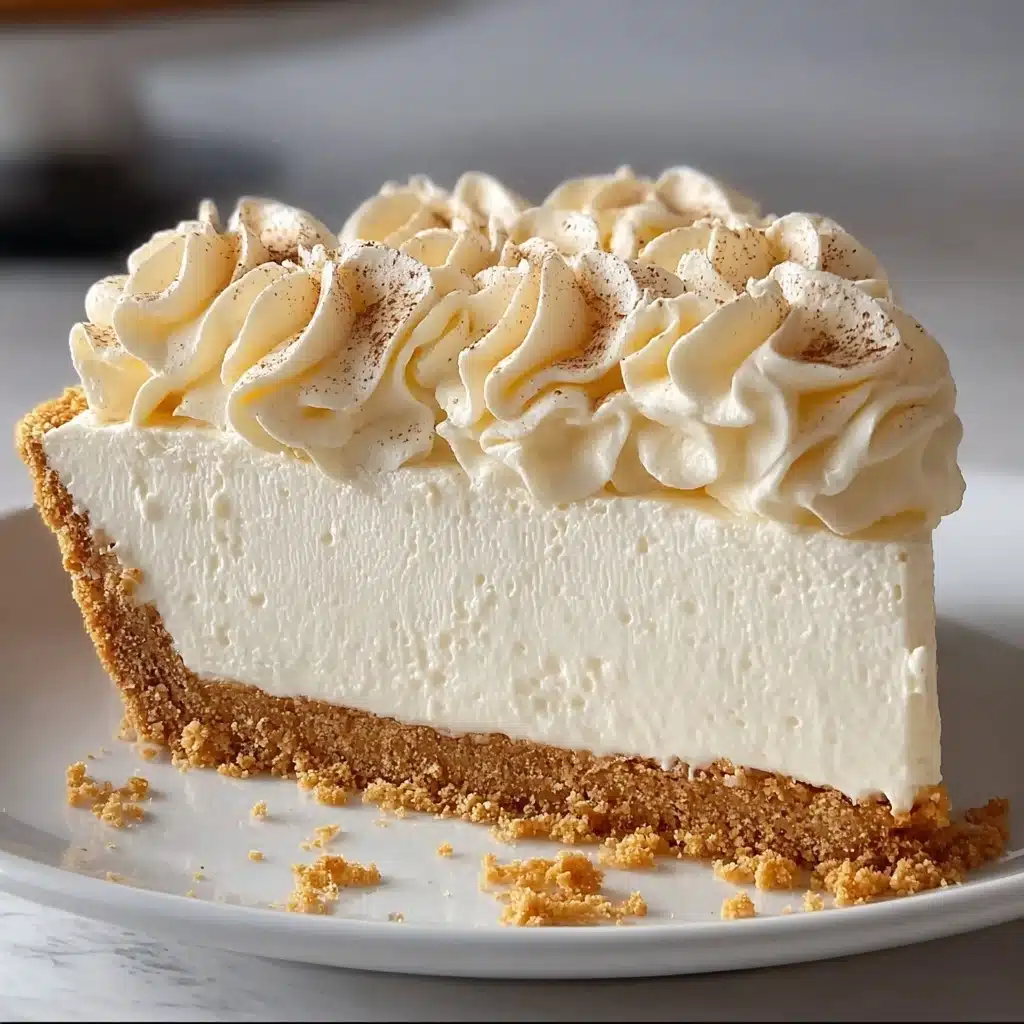
Garnishes
Topping your Marshmallow Whip Cheesecake isn’t just about looks—it’s about adding pops of flavor and fun! A mix of fresh berries brings juiciness and color that wake up every bite, while mini marshmallows or curls of chocolate lend whimsy and extra indulgence. A few crushed graham crackers as a finishing touch add crunchy nostalgia, making each serving truly special.
Side Dishes
While this cheesecake can easily steal the show solo, pairing it with fresh fruit salads or a cup of strong espresso can make dessert even more delightful. Consider a bright raspberry coulis drizzled on the plate or a selection of sliced stone fruits—these sides complement the creamy texture and balance the sweetness beautifully.
Creative Ways to Present
Why not have a little fun with presentation? You can serve Marshmallow Whip Cheesecake in individual jars for adorable, portable treats—perfect for picnics and parties. Try piping the filling into hollowed-out strawberries or set up a cheesecake “bar” where guests can customize their own slice with a variety of toppings. It’s dessert, but with a dash of showmanship!
Make Ahead and Storage
Storing Leftovers
Leftover Marshmallow Whip Cheesecake is a wonderful treat for days to come! Simply cover the pan tightly with plastic wrap or transfer individual slices to an airtight container. Store them in the refrigerator and enjoy within 3 to 4 days for optimal taste and texture—though, spoiler alert, it usually disappears much faster!
Freezing
If you want to keep your cheesecake for longer, freezing is your friend. Slice the cheesecake and wrap each piece individually in plastic, then foil. Store the wrapped slices in a freezer-safe bag or container for up to a month. To enjoy, thaw in the refrigerator overnight; the texture stays creamy and delightful.
Reheating
No need to worry about reheating with Marshmallow Whip Cheesecake—this dessert is best served chilled! If you prefer it a touch softer, let it sit at room temperature for 10 to 15 minutes before serving. Just avoid direct heat or microwaving, which can change the texture and flavor.
FAQs
Can I use homemade whipped cream instead of store-bought topping?
Absolutely! If you love making your own whipped cream, go for it. Just make sure it’s whipped to stiff peaks so your Marshmallow Whip Cheesecake stays light and stable. Swap equal amounts for the store-bought version, and keep everything nice and chilled.
My crust seems crumbly. What did I do wrong?
A crumbly crust usually means there wasn’t quite enough butter to bind the crumbs, or it wasn’t packed firmly enough into the pan. Next time, make sure every bit of graham cracker is coated in butter, and press the mixture down firmly with the bottom of a glass for the best results.
Can I add flavors to the filling?
Definitely! Try folding in some lemon zest for brightness, a splash of almond extract for warmth, or even a swirl of melted chocolate before chilling. Marshmallow Whip Cheesecake is a perfect blank canvas for your flavor experiments.
Is this cheesecake gluten-free?
With a simple swap to gluten-free graham crackers for the crust, you’re all set! The rest of the ingredients are naturally gluten-free. Serve with confidence to friends and family with gluten sensitivities.
Can I make Marshmallow Whip Cheesecake ahead for a party?
Yes! In fact, this cheesecake is even better when made ahead so it can chill and set completely. Prep it the day before, keep it covered in the fridge, and add your toppings right before the party. Stress-free entertaining at its best!
Final Thoughts
If you hadn’t guessed, I’m completely smitten with Marshmallow Whip Cheesecake and think you will be, too! It’s effortless yet show-stopping, nostalgic yet refreshingly modern. The next time you crave something luscious and shareable, give this recipe a try—it might just become your new go-to dessert.
Print
Marshmallow Whip Cheesecake Recipe
- Total Time: 4 hours 20 minutes
- Yield: 1 9-inch cheesecake 1x
- Diet: Vegetarian
Description
Indulge in the light, fluffy decadence of this Marshmallow Whip Cheesecake. A dreamy combination of creamy cheesecake filling atop a buttery graham cracker crust, topped with your favorite garnishes for a truly delightful dessert experience.
Ingredients
Graham Cracker Crust:
- 1½ cups graham cracker crumbs
- ⅓ cup granulated sugar
- ½ cup (1 stick) unsalted butter, melted
Cheesecake Filling:
- 16 oz cream cheese, softened
- 7 oz marshmallow fluff (1 jar)
- 1 tsp vanilla extract
- 1 container (8 oz) whipped topping (like Cool Whip), thawed
Optional Toppings:
- Fresh berries
- Mini marshmallows
- Chocolate shavings or drizzle
- Crushed graham crackers
Instructions
- Make the Crust – In a medium bowl, mix graham cracker crumbs and sugar. Stir in the melted butter until well combined. Press mixture firmly into the bottom of a 9-inch springform pan. Chill in the fridge while preparing the filling.
- Prepare the Filling – In a large mixing bowl, beat the cream cheese until smooth and fluffy. Add marshmallow fluff and vanilla extract, mixing until well combined and creamy. Gently fold in the whipped topping until the mixture is light and airy.
- Assemble the Cheesecake – Spread the cheesecake mixture over the chilled crust. Use a spatula to smooth the top evenly. Cover with plastic wrap and refrigerate for at least 4 hours, preferably overnight.
- Decorate and Serve – Before serving, add your choice of toppings — fresh strawberries, mini marshmallows, or a drizzle of chocolate sauce. Carefully remove the springform ring, slice, and serve chilled.
Notes
- Prep Time: 20 minutes
- Category: Dessert
- Method: Chilling, Mixing, Assembling
- Cuisine: American
Nutrition
- Serving Size: 1 slice (1/12 of cheesecake)
- Calories: 380
- Sugar: 25g
- Sodium: 280mg
- Fat: 25g
- Saturated Fat: 15g
- Unsaturated Fat: 8g
- Trans Fat: 0g
- Carbohydrates: 35g
- Fiber: 1g
- Protein: 4g
- Cholesterol: 70mg
Keywords: Marshmallow Whip Cheesecake, Cheesecake Recipe, Dessert, Marshmallow Fluff, Graham Cracker Crust

