Coffee Cheesecake Recipe
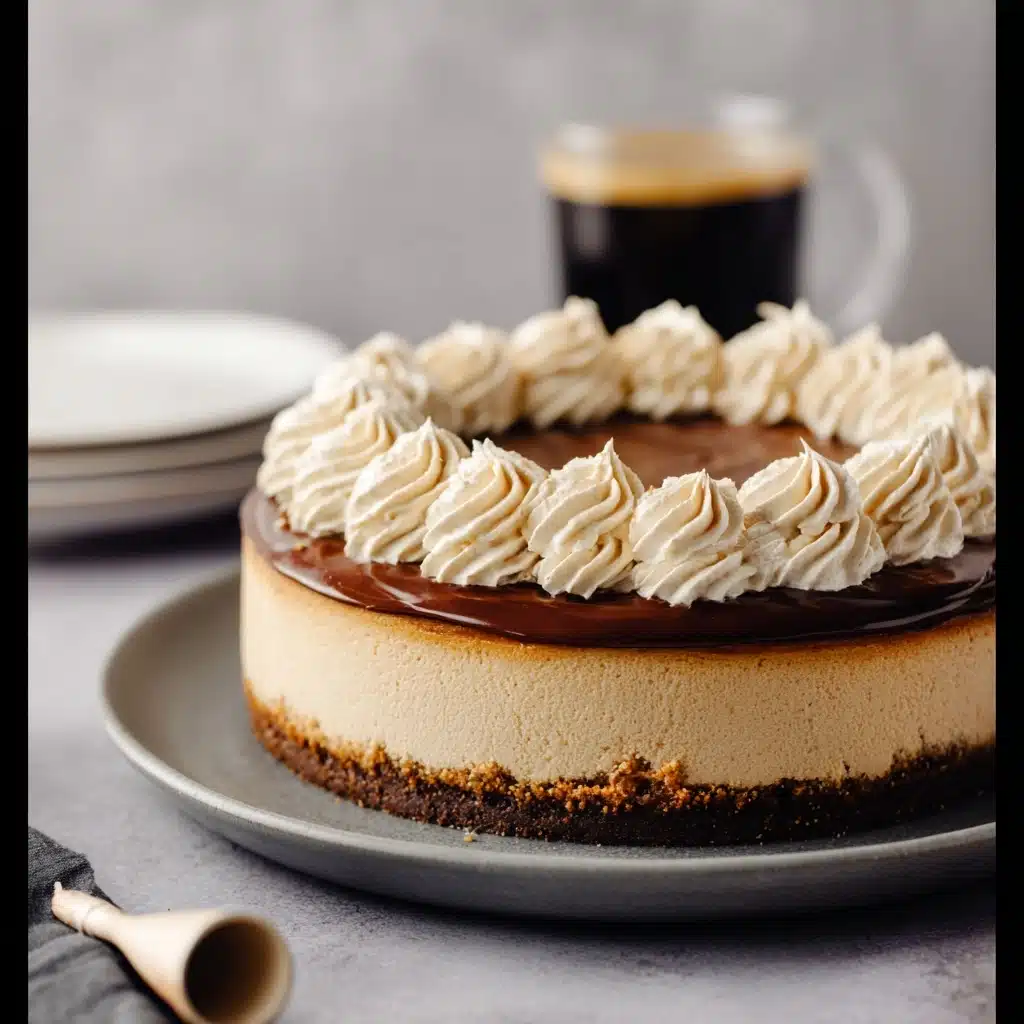
If you’re torn between your love for coffee and your passion for cheesecake, this Coffee Cheesecake Recipe is about to make your dreams come true. Each slice is a luscious blend of creamy, tangy cheesecake and bold espresso flavor, all sitting on a chocolatey cookie crust that’s pure magic. Whether you need a show-stopping dessert for guests or just want to treat yourself to a little caffeine-spiked comfort, this bake brings a sophisticated touch to your dessert table and turns every bite into a reason to celebrate!
Ingredients You’ll Need
It’s amazing how a simple lineup of ingredients can come together to make a restaurant-quality dessert at home! Each component in this Coffee Cheesecake Recipe plays an important role—think creamy base, intense coffee flavor, and that irresistible chocolate crust. Here’s what you’ll need, plus a few insider tips to help every part shine.
- Crushed chocolate cookies: Go for Oreos with the filling removed or any classic chocolate cookie for that deep cocoa flavor and a firm crust base.
- Unsalted butter: Melted butter binds the crust together and adds rich, melt-in-your-mouth texture.
- Full-fat cream cheese: Only full-fat will do for ultra-creamy, dreamy cheesecake filling—don’t settle for low-fat here!
- Granulated sugar: Just the right amount of sweetness to highlight both the cheese and the espresso.
- Sour cream: Adds a subtle tang and smooths out the richness of the filling for perfect flavor balance.
- Vanilla extract: Brings warm, aromatic notes that blend beautifully with coffee and chocolate.
- Espresso powder: For true coffee lovers! Dissolved in hot water, it infuses that unmistakable java kick.
- Hot water: The magic touch for dissolving espresso powder and evenly distributing that bold coffee flavor throughout your batter.
- Salt: Just a pinch enhances every other flavor, making the cheesecake even more addictive.
- Large eggs: These bind everything together and create that classic velvety, luscious cheesecake texture.
How to Make Coffee Cheesecake Recipe
Step 1: Preheat and Prepare the Pan
Start by preheating your oven to 325°F (160°C). Don’t skip lining the bottom of your 9-inch springform pan with parchment paper—even seasoned cheesecake bakers swear by this trick for easy removal. Lightly grease the sides for that flawless finish when you release the springform later.
Step 2: Make the Crust
Time to set the stage! Combine your crushed chocolate cookies and melted butter in a bowl, stirring until every crumb looks glossy. Tip the mixture into your prepared pan, then use the bottom of a glass to really press it down. A tight-packed crust makes for easy slicing and tasting. Bake for 10 minutes just to set it, then let it cool—you don’t want a soggy base under that creamy filling.
Step 3: Prepare the Filling
Here’s where the magic happens. In a large mixing bowl, beat the softened cream cheese until it’s completely smooth and creamy. It’s worth taking your time (and scraping down the sides, trust me!) for a lump-free batter, because nobody invites lumps to cheesecake night.
Step 4: Add Sugar and Mix
Now, gradually add in the granulated sugar while beating on medium speed. This step is all about getting that silky, decadent texture and just-right sweetness. Make sure sugar is fully incorporated so you get a smooth filling without any graininess.
Step 5: Incorporate Liquid Ingredients
In a small separate bowl, dissolve the espresso powder in hot water. Marvel at that rich, aromatic coffee aroma! Add this mixture to the cream cheese batter, along with sour cream, vanilla, and salt. Blend until everything is well mixed—it’s the secret to a balanced, coffee-kissed cheesecake.
Step 6: Add Eggs
Carefully add the eggs one at a time, gently beating after each addition. Be sure to scrape the bowl between eggs for even mixing. This step needs a gentle hand: don’t overbeat, or you’ll introduce too much air (which can lead to cracks or a soufflé-like texture rather than a smooth, dense finish).
Step 7: Pour and Smooth
Pour the luscious filling onto your cooled crust, then give the pan a few gentle taps on the countertop to pop any air bubbles. This is the trick for a pristine, dense, crack-free surface worthy of any bakery window.
Step 8: Bake the Cheesecake
Into the oven it goes! Bake for 55 to 65 minutes, watching for the edges to look set while the center has a slight wobble. That little jiggle means you’ll end up with the perfect creamy texture once it’s chilled.
Step 9: Cool Gradually
Patience pays off here—turn off the oven and crack the door open, letting your cheesecake cool gently inside for 1 hour. This slow cool-down helps prevent cracks and sets the velvety filling without shock.
Step 10: Chill Completely
Transfer the coffee cheesecake to the fridge and let it chill for at least 6 hours, or overnight if you can handle the anticipation. The cheesecake will finish setting up, flavors will meld, and you’ll be rewarded for your patience with neat slices and rich flavor.
How to Serve Coffee Cheesecake Recipe
Garnishes
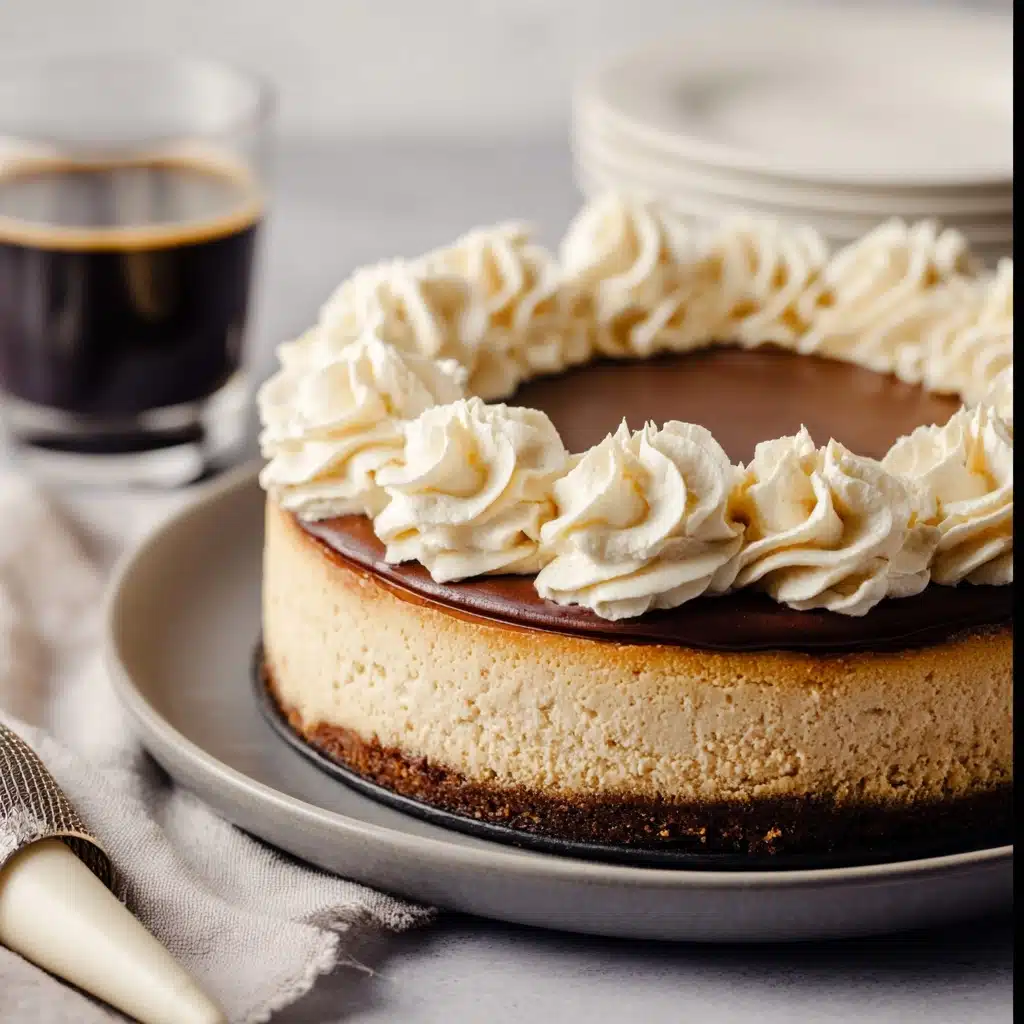
A showpiece like this Coffee Cheesecake Recipe deserves a little flourish! Scatter a few chocolate curls, a dusting of cocoa, or even a swirl of whipped cream on top. For extra intrigue, try a sprinkle of finely ground espresso or a few chocolate-covered coffee beans for crunch and visual appeal.
Side Dishes
This cheesecake is pure indulgence on its own, but if you want to round out your dessert course, pair slices with fresh berries or a tart raspberry sauce—the acidity is the perfect contrast to the creamy coffee filling. A scoop of vanilla ice cream or even an affogato (espresso poured over ice cream) also makes a decadent companion.
Creative Ways to Present
While a classic wedge is always a hit, consider cutting your Coffee Cheesecake Recipe into bite-sized bars for party platters or special occasions. Layer individual portions in small jars for a portable treat, or create mini cheesecakes using a muffin tin for a personal dessert everyone will love.
Make Ahead and Storage
Storing Leftovers
Leftover cheesecake stores like a dream. Simply cover the pan or transfer individual slices to an airtight container. Keep it in the refrigerator, where it will stay fresh for up to 5 days. The flavors deepen and the texture stays divine—a win-win for next-day cravings.
Freezing
You can absolutely freeze your Coffee Cheesecake Recipe for longer storage. Wrap individual slices (or the whole cheesecake, uncut) tightly in plastic wrap, then in aluminum foil, and freeze for up to 2 months. Thaw overnight in the fridge before serving for the best texture and flavor.
Reheating
While cheesecake is typically enjoyed cold and creamy, if you’d like to take the chill off, let your slice sit at room temperature for about 15 minutes before serving. Avoid microwaving, as it can make the texture uneven or rubbery—patience is your friend here!
FAQs
Can I use instant coffee instead of espresso powder?
Instant coffee will work in a pinch, but espresso powder is much stronger and gives this Coffee Cheesecake Recipe its signature depth. If you use instant coffee, double the amount for a more pronounced flavor.
What’s the best way to get clean cheesecake slices?
For bakery-worthy slices, dip a sharp knife in hot water and wipe it clean between each cut. This keeps the creamy filling neat and eliminates crumbles or smears on your plate.
Can I make this recipe gluten-free?
Absolutely! Just use gluten-free chocolate cookies for the crust, and double-check that your other ingredients (especially espresso powder and vanilla) are certified gluten-free.
Why did my cheesecake crack?
Cracks can happen if the cheesecake cools too quickly, is overbaked, or the batter was overbeaten. Follow the gradual cooling instructions, avoid overmixing, and keep an eye on bake times for silky, crack-free results.
Is it possible to make mini versions of this cheesecake?
Definitely! Spoon the crust and filling into lined muffin tins and adjust the baking time to about 18–22 minutes. Check that the centers jiggle slightly for perfect individual portions.
Final Thoughts
If you adore coffee and crave creamy, baked desserts, this Coffee Cheesecake Recipe is the treat you’ve been waiting to fall in love with. With its rich flavor, spectacular texture, and stunning presentation, it’s a guaranteed crowd-pleaser—so don’t let another coffee break go by without this on your table. Give it a try and let your friends and family experience pure cheesecake bliss!
Print
Coffee Cheesecake Recipe
- Total Time: 7 hours
- Yield: 1 9-inch cheesecake 1x
- Diet: Vegetarian
Description
Indulge in the rich and creamy delight of Coffee Cheesecake, a perfect blend of your favorite morning pick-me-up and a decadent dessert. This recipe combines a chocolate cookie crust with a luscious espresso-infused filling, creating a treat that is sure to impress your taste buds.
Ingredients
FOR THE CRUST
- 1 ½ cups crushed chocolate cookies (such as Oreos with filling removed or any plain chocolate cookie)
- 5 tablespoons unsalted butter, melted
FOR THE FILLING
- 24 oz (3 blocks) full-fat cream cheese, softened
- 1 cup granulated sugar
- ¾ cup sour cream
- 1 tablespoon vanilla extract
- 1 tablespoon espresso powder
- 2 tablespoons hot water
- ¼ teaspoon salt
- 3 large eggs
Instructions
- PREHEAT AND PREP THE PAN: Set the oven to 325°F (160°C). Lightly grease a 9-inch springform pan and line the bottom with parchment paper to prevent sticking.
- MAKE THE CRUST: Combine the crushed chocolate cookies and melted butter in a bowl. Stir until the crumbs are evenly coated. Press the mixture firmly into the bottom of the prepared pan using the bottom of a glass. Bake for 10 minutes, then remove from the oven and set aside to cool.
- PREPARE THE FILLING: In a large mixing bowl, beat the softened cream cheese until completely smooth and lump-free. Scrape down the sides of the bowl to ensure even mixing.
- ADD SUGAR AND MIX: Add the granulated sugar to the cream cheese and beat until fully combined and smooth.
- INCORPORATE LIQUID INGREDIENTS: In a small bowl, dissolve the espresso powder in the hot water. Add the sour cream, vanilla extract, espresso mixture, and salt to the batter. Mix until well blended.
- ADD EGGS: Add the eggs one at a time, beating slowly and scraping the sides of the bowl after each addition. Mix just until incorporated. Avoid overbeating to prevent adding too much air into the batter.
- POUR AND SMOOTH: Pour the batter over the cooled crust in the springform pan. Gently tap the pan on the counter a few times to release any trapped air bubbles.
- BAKE THE CHEESECAKE: Place the cheesecake in the oven and bake for 55 to 65 minutes. The edges should be set and the center should still have a slight jiggle when gently shaken.
- COOL GRADUALLY: Turn off the oven and crack the door open. Leave the cheesecake inside for 1 hour to cool slowly. This helps prevent cracking.
- CHILL COMPLETELY: Transfer the cheesecake to the refrigerator and chill for at least 6 hours, preferably overnight, before slicing and serving.
Notes
- For a stronger coffee flavor, you can increase the amount of espresso powder used.
- Ensure all ingredients are at room temperature for a smoother batter.
- Prep Time: 20 minutes
- Cook Time: 1 hour
- Category: Dessert
- Method: Baking
- Cuisine: American
Nutrition
- Serving Size: 1 slice (assuming 12 slices)
- Calories: 380
- Sugar: 24g
- Sodium: 320mg
- Fat: 28g
- Saturated Fat: 16g
- Unsaturated Fat: 9g
- Trans Fat: 0g
- Carbohydrates: 28g
- Fiber: 1g
- Protein: 7g
- Cholesterol: 125mg
Keywords: Coffee Cheesecake, Dessert Recipe, Cheesecake Recipe, Coffee Dessert

